-
Search It!
-
Recent Entries
-
Links
Bánh mì
from Mr. Baguette, in Los Angeles (Rosemead). Very tasty! This one has grilled pork and pickled vegetables.
I’d never had bánh mì before, but I will in the future if I ever have a chance. The sandwich was excellent and cost something like $3.75. A great food bargain. The baguette was perfect, the crust shattering when I took a bite. The pork was sweet and savory at the same time.
The vegetables were lightly pickled The orange is burdock root, I believe, and the white daikon radish. It also came with some very hot jalapenos.
I think it would have been improved by the addition of even more crunchy vegetables, like the cucumber you often see on vietnamese plates.
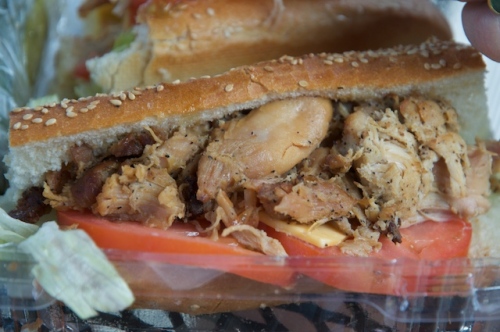
Susan had the grilled chicken.
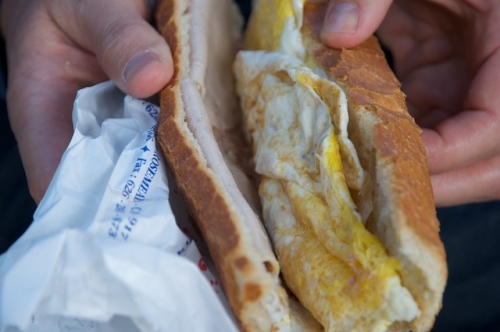
We all kind of shared the “meatload”, which had fried egg, paté and ? (not sure what kind of meat.)
Posted in Uncategorized
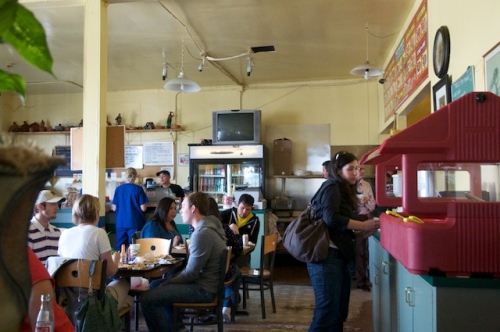
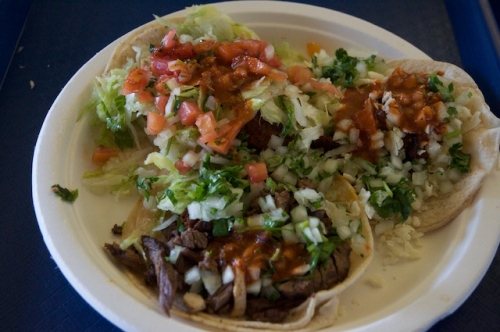
Carne Asada Taco

A very good taco I had at Tacos Por Favor in Santa Monica. I also had a chorizo & queso taco and a fried fish taco.
Posted in Uncategorized
Artisan Bread on the Gas Grill
For the past 10 years or so, our family has always baked bread on snow days (when school is cancelled) in the winter. With the kids home from school and driving around not a good idea, it’s a fun and tasty snow day activity; plus you’re stuck at home and can deal with the mixing, kneading, rising, proofing and baking, which can stretch out over the course of several hours, depending on the bread recipe. There are few things better than hot bread, with butter and honey, when you’re stuck inside on a snowy day. Homemade soup might be better, but you can cook that too, and eat it along with the bread!
Last year we didn’t have any snow days, and most years only have 3 or 4. Recently, I decided that we need to do better than that and cook bread more often, even in the summer. There’s no good reason we can’t have good bread at least once a week. (Although we do have an awesome bakery in our town, Wheatfield’s, so it’s not like we can’t get excellent bread.)
So I started reading up, and seeing what was available to help us achieve homemade bread more often. I got Peter Reinhart’s books, The Bread Baker’s Apprentice and American Pie (about pizza), read about and made the no-knead bread in this article (tasty!) and read a lot on The Fresh Loaf and other food blogs. One of the things that these advocate in common is a strategy that stretches the making of the bread over many hours (generally overnight) so that the mixing can happen rather quickly and the first rise/maturation/fermentation can happen over the course of hours (or days), then the proofing and baking happen on another day. Reinhart’s book goes into great detail to explain why this makes better tasting bread, his research is fun to read, and the bread is very good.
Perhaps the easiest one for me is the strategy outlined in Artisan Bread in Five Minutes a Day, by Hertzberg and Francois. In essence, you quickly mix all the ingredients together in a mixing bowl, with a spoon (so no KitchenAid to clean up), let it rise for a couple of hours, then dump it in a container for refrigerator storage. You can leave it there for up to 2 weeks they say (mine has never lasted that long). When you want to use it, cut off a chunk, shape it into a loaf, let it proof for an hour or so (they say 40 minutes. I’ve done it for as long as an hour-and-a-half) and bake. So it’s totally feasible to imagine baking fresh bread on a weeknight after working all day. There’s a lot to like about the simplicity of the system, and the bread is excellent. Best bread I’ve ever made at home.
Another twist to my approach is the baking of the bread in a gas grill. It’s summer here and I can’t bear to heat up the house with the oven. So I’ve spent a good bit of time learning and experimenting to bake outdoors in the gas grill. It makes a beautiful crust and there’s not really any trick to it once you get the grill set up. I might even continue to cook outdoors in the winter—although it’s nice to have the smell in the house in the winter. When it cools off, I’ll cook some in the oven and see how it compares.
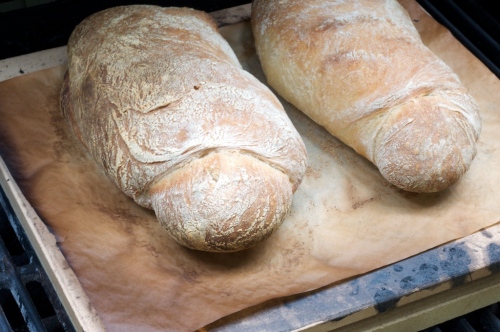
The trick to cooking in the grill is to moderate the direct heat coming off the burners in the bottom. I cooked my first loaf on a pizza stone; the bottom burnt, but the bread itself was very good. So I got another pizza stone (actually it’s a 1 inch thick kiln shelf I got from a local potter’s supply place) and put it below the first. The top stone has little feet on it so there is a small air gap between the stones. I checked the temperature of the top stone with an infrared thermometer and it’s around 400° F. (The bottom stone is probably 900°). The thermometer in the lid reads about 500°. It takes a good half hour to 45 minutes of preheating to get the stone up to temperature. (Reinhart recommends preheating the kitchen oven for an hour if you’re cooking on a stone, so it’s not that much different.) I think you could put any number of things under the top stone to moderate the heat: bricks, ceramic tiles, quarry tiles.
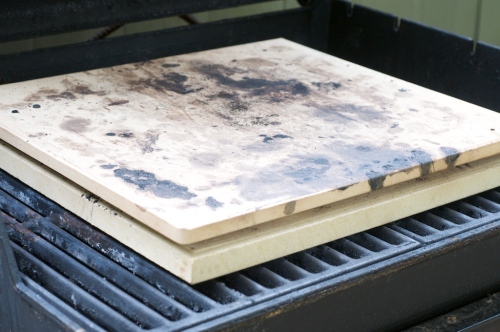
I have used this dough for pizza and flat bread, although Peter Reinhart’s recipe for Neo-neapolitan pizza dough is better. But still, in a pinch you can make it work, and it’s probably way better than most pizza you’ll buy in your town. For flat bread, stretch it out and cook it directly on the grill grate, with no stones at all. It takes about 3 minutes a side, if that much. Keep a close eye on it.
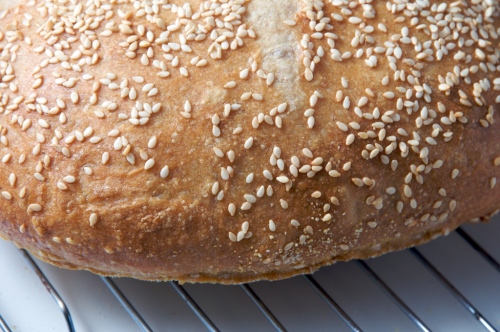
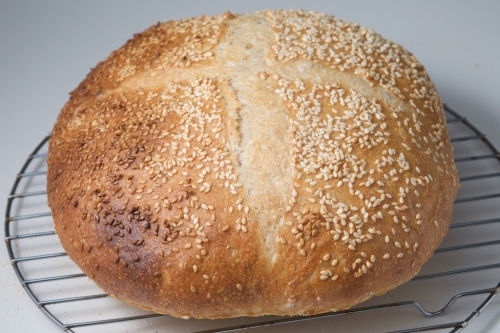
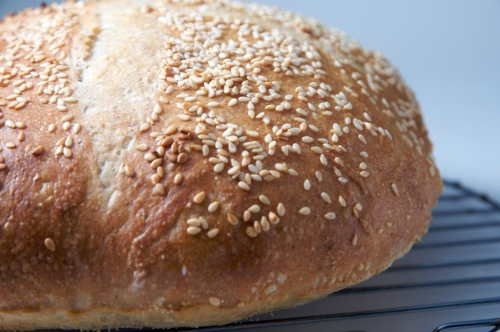
For me, the big, round simple loaf works best, covered in sesame seeds.
Here you go:
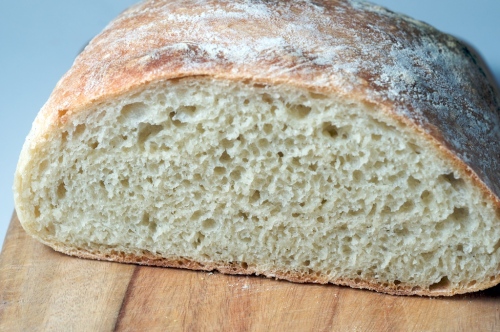
Artisan Bread on the Gas Grill
Ingredients
4 cups King Arthur All-purpose flour
4 cups King Arthur Bread flour
1.75 cups King Arthur Whole Wheat Flour
2 Tb Kosher Salt
1 Tb Instant yeast
4.75 cups Water, room temperature.
1 egg (for topping)
sesame seeds (for topping
Directions
- Mix dry ingredients in large mixing bowl.
- Add water and mix thoroughly with a wooden spoon or spatula.
- Cover with a towel and let sit at room temperature for 2 hours.
- Place in an oiled container and cover (but not tightly; you need the container to breathe a bit.) Refrigerate.
- Cool overnight, and for as long as 2 weeks (I don’t know what happens after that…..)
- To bake, cut off a grapefruit-sized hunk of dough, and shape into a loaf on a floured surface.
- Place the loaf on parchment paper on a peel or rimless cookie sheet (or the bottom of a regular baking sheet)
- Let proof in a warm location for about an hour.
- About 40 minutes before you plan to cook, preheat your grill (see note below.)
- Right before cooking brush on a beaten egg and coat with sesame seeds.
- Slash a cross in the top with a razor blade or sharp knife.
- Bake for approximately 30 minutes, or until internal temperature registers ±200°F.
- All the bread books say to let it cool before eating. Good luck with that. Our family waits a bit, but always eats it when it’s still warm enough to melt the butter.
Note on the grill setup: Obviously there will be a variation between different makes and models of grills. I have a Weber gas grill with 3 burners. I leave them on high the whole time. For some reason, one side of my grill is warmer than the other, so I check in on it every 10 minutes or so, and rotate the bread so each side gets some of the warm spot. You’ll have to experiment to see what works for your setup.
Posted in cooked at home
Gas Grill Pizza
Peter Reinhart’s book, American Pie, provided the theoretical background for this pizza. Reinhart takes you on a tour across Italy and US looking at different approaches to pizza. You should get this book if you’re serious about making your own pizza.
I had Grimaldi’s Pizza in Brooklyn last winter and came away determined to learn more about making simple but delicious pizza. This recipe is based on his “Neo-neapolitan” pizza, which he says is close to what Grimaldi’s (and other New York/New Haven) Pizzeria’s dough is like.
I like this pizza as much as most any I’ve ever had. I’d never say it’s as good as Grimaldi’s, but for Lawrence, Kansas, it’s potentially as close as you can get.
I upsized Reinhart’s recipe by 50%, so I could make 6 dough balls instead of 4. Our family can eat 3 pies at a time, so the 6 ball recipe works well for us.
I developed this cooking technique for the summer, when it seems crazy to heat up the house with the oven. I bake in the grill a lot: bread, cobbler, pizza. If you can do it in a conventional oven, you can probably do it in a gas grill with enough practice.

- DOUGH
- 34 oz. bread flour, (7.5 cups)
- 1.5 tbsp honey
- 5 tsp kosher salt
- 1.5 tsp instant yeast
- 3 tbsp olive oil
- 2 ¾ cups water, room temp.
- TOPPINGS
- fresh mozzarella
- sliced tomatoes
- fresh basil leaves
- (see UPDATES, below.
- TOMATO SAUCE
- 28 oz. crushed tomatoes
- 1 tsp dried basil
- 1 tsp dried oregano
- 5 cloves pressed garlic
- 2 tbsp wine vinegar
- 1 tsp kosher salt
- black pepper

MAKING THE DOUGH
This recipe assumes you’re using a stand mixer. Modify accordingly if you’re working by hand.
Peter Reinhart’s theory behind this dough is that it tastes better the next day, so you do this a day ahead. (I’ve never cooked it same day, so I can’t say what happens if you do.)
Mix dry dough ingredients in stand mixer w/ dough hook. Slowly add olive oil, then water on low speed for about 4 minutes. Let it rest for 5 minutes, then resume mixing for 2 more minutes. This is a moist dough, and should be sticking to the bottom of the bowl, but not to the sides. If it’s not like this, add tiny amounts of water or flour as needed to get the right consistency.
As soon as it’s mixed, divide the dough into 6 even pieces and form each into a ball. Rub each ball of dough with olive oil and place each into its own zipper plastic bag. Let them sit at room temperature for 15 minutes before placing them in the refrigerator (or freezer if you’re not going to use them the next day) to age overnight.
Remove dough balls from refrigerator 2 hours prior to cooking time. After they’ve warmed up, shape them into pizza crusts, top and cook.
TOMATO SAUCE
Mix all ingredients together over low heat. You don’t really need to cook it, just heat it through
.
TOPPING THE PIES
I like the dough stretched pretty thin (maybe 1/8″ thick, tops).
I suggest using whatever toppings you prefer. Reinhart promotes simple and few toppings, which I agree with, but it’s your pie, so do what makes you happy. (SEE UPDATES BELOW.)
Stretch the raw dough out and put on a peel or (rimless cookie sheet) that’s been well-dusted with cornmeal, or with a piece of parchment paper. The wet toppings can have a tendency to soak through and make the dough stick to the peel, so it’s important for you to do whatever you need to to get the topped pie off the peel and onto the stone without wrecking the pizza.
COOKING THE PIZZA ON THE GAS GRILL (my innovation)
I use a Weber gas grill, with 3 burners. I imagine almost any grill would provide adequate heat, but I’ve only ever done it on my Weber.
Place 2 pizza stones (one one top of the other) on the grate of the gas grill. (One of my pizza stones is actually a kiln shelf for a ceramic kiln.) My top stone has little feet on it, making an important air gap between it and the bottom stone. The bottom stone takes the primary heat from the direct flames below, and softens it for the top stone.
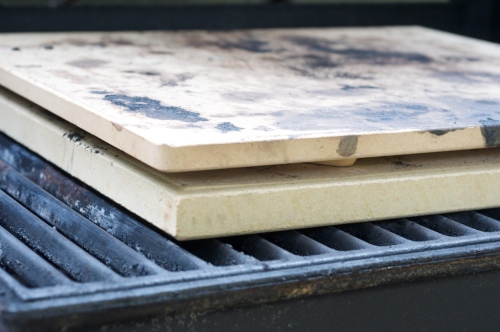
Turn the burners to high and preheat for 30 minutes. The thermometer in the lid reads about 500 degrees. The stone surface reads about 450 degrees on an infrared thermometer.
Slide the pie off the peel onto the hot stone and close the lid. I cook mine for 6 or 7 minutes usually. But different dough thicknesses and kinds of toppings can make that vary. You’ll know when it’s done.

UPDATE: Some recent pies:
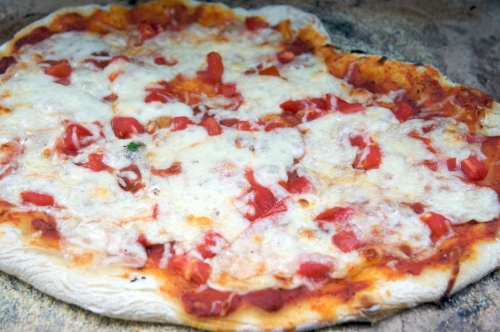
Margherita: Fresh Mozzarella and Tomatoes

Bacon and Caramelized Onion, with Fresh Mozzarella and Fresh Tomatoes

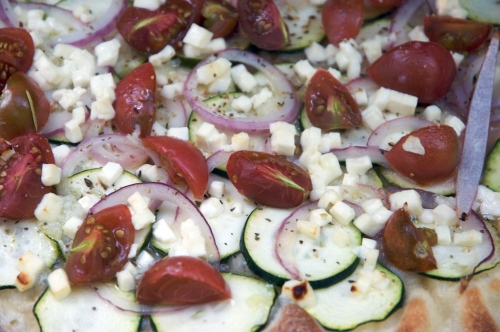
Spinach, Feta and Julienned Zucchini, with Fresh Tomatoes.
Note on Fresh Tomatoes: They have a lot of water in them which can make problems with excess water on your pizza. I find it best to chop the tomatoes up 3o minutes before, salt them a bit and let them drain in a colander. The salt draws out the excess moisture. I also squeeze a garlic clove or two in as well, and let that flavor the tomatoes with the salt. Good stuff.
UPDATE 2
Some killer topping combinations that we’ve been experimenting with the past few weeks of summer (winter will bring a new round of testing, with those sorts of flavors):
Fresh tomatoes (see note above), chopped fresh spinach, feta cheese, red onions, fresh mozzarella.
Fresh tomatoes (see note above), Genoa salami, Calamata olives, pickled Hungarian (sweet) peppers, red onion, fresh mozzarella. Truly awesome!
I’m thinking that the marina sauce can be a bit too much. If you have good fresh tomatoes, I think it’s best to leave off the marinara, and use plenty of fresh tomatoes. It could be a seasonal thing– wintertime, when fresh tomatoes are scarce, might be a better bet for the marinara.
Posted in cooked at home
Burgers on the Road
It’s been a busy summer with travel and house construction, hence the lack of postings here. But now that school has started again, we’re back home, cooking and eating.
One of the highlights on our travels was Larkburger in Edwards, Colorado. (They also have a location in Boulder.)

It was not particularly fancy, just excellent beef and cheddar cheese on a perfect bun. It was served with lettuce, tomato and onion and had a special sauce.

The fries were a bit fancier: they were served with parmesan and white truffle oil. They also had a great milk shake on the menu.

*****************************************
Just yesterday, we went to a local favorite, Bobo’s, in Topeka, Kansas. Bobo’s is old school. They’ve been in operation for over 50 years, according to the sign.
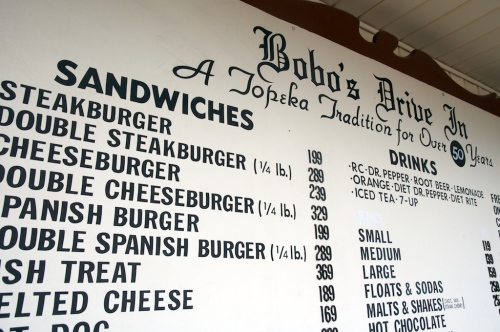
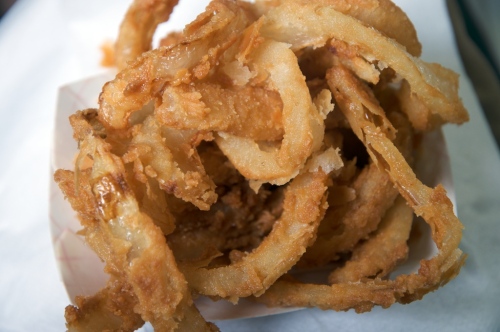
Also a simple burger: beef, onion, lettuce, pickle. The onion rings are perfect, and the shakes excellent.
It’s tough to beat a good burger. I ate all of mine before I had a chance to photograph it. Here’s a blurry shot of Shannon’s last bite.
Posted in restaurants
Pork Sausages
Beer & Cumin Sausage

These are tasty sausages.
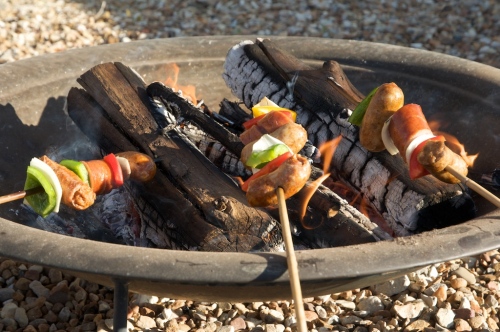
We made them for a going-away party for Barry and Zuzanna, Montana bound. We par-boiled them a bit, then cooked on skewers with onions and bell peppers over an open wood fire.
Grinding meat and stuffing: I first started making sausage with my friend Joe in Cambridge, in the late 80’s, and have used a variety of techniques for grinding and stuffing, most of which have been frustrating at some level. I now like my current setup.
I use the meat grinder attachment for the Kitchen Aid stand mixer to grind the meat. I find that the 1/4″ plate works best. I used to cut the meat in bigger chunks and then had to force the chunks down the throat of the grinder. Now I cut them into chunks that will easily slide down the throat into the auger with little or no force applied. I attempted to use the sausage stuffer on the Kitchen Aid too, numerous times, and it was generally disastrous. Meat got hung up in the auger and it took a lot of force to actually get it into the casing. Based on my experience, I would never advise anyone to use the KA for stuffing.
Last summer I got a standalone stuffer like this one. What a dream! You can make 3 pounds of links in about 5 minutes. Clean up is kind of a drag because it doesn’t fit in the sink easily, but I manage somehow. I mounted it to an old cutting board and it sits on the counter. It doesn’t need clamping or anything.
It helps to have a helper. Ella, my daughter, helped with this batch. One person to plunge the meat and another to make the links. Have a toothpick handy to poke holes in the casing if air bubbles form. I generally make a pinch in the casing between links as it’s coming off the stuffer, to provide space in the casing, then twist them into links afterwards. I freeze them in conveniently-sized zipper bags.

Ingredients
- 3 lbs ground pork shoulder
- ½ lb bacon, chopped
- 1 tbsp kosher salt
- 1 tsp black pepper
- 1 tbsp chopped garlic
- 1 tbsp ground cumin
- 1 tbsp chili powder
- 1 tbsp smoked paprika
- 1 tsp ground coriander
- 2 tsp sugar
- 1 cup beer
- sheep casings
Method
1. Cut chunks of pork off the bone into about 1″ cubes. Don’t trim the fat away; you need a certain amount of fat to keep it from being too dry. I find that the pork shoulders I get around here have adequate fat. And don’t make the chunks too big or you may have trouble getting them into the grinder easily.
2. Chop fresh bacon into 1/2″ pieces
3. Mix dry ingredients together
4. Add dry ingredients to the meat, and mix thoroughly with your hand. Make sure to get the meat covered with spices. Refrigerate several hours or overnight.
5. Run meat through 1/4 plate in meat grinder. Mix thoroughly again with the cup of beer.
6. Stuff into sheep casings, and make links whatever size you want.
7. Cook in any number of ways. For this batch, we intended to cook them on skewers over an open fire, so I par-boiled them for 10 minutes or so. That way, the cooking on the fire is mostly for char and flavor, and you don’t need to worry so much about cooking all the way through. You could cook them in a skillet, or over a charcoal grill.
Posted in cooked at home
Dark Brown Sugar Chocolate Chip Cookies
Dark Brown Sugar Chocolate Chip Cookies

This came about when I only had one egg in the house; it’s a variation on the Nestle’s Toll House recipe, which calls for 2 eggs.
I used all brown sugar (instead of half white/half brown) to increase the moisture and chew a bit. I also used 2 Tb canola oil in place of 2 Tb butter, to get a bit more moisture in the dough.
They’re good cookies. The brown sugar gives them a richer, more caramel-y flavor, and they have a bit more chew, too.
Ingredients
- 12 tablespoons butter, softened
- 1.5 cups dark brown sugar
- 1 egg
- 2 tablespoons canola oil
- 1 tsp vanilla
- 2.25 cups all-purpose flour
- 1 tsp salt
- 1 tsp baking soda
- 12 oz. semi-sweet chocolate chips

Method
Oven to 350º
Cream Butter and sugar, add egg, oil and vanilla. Mix until fluffy. (I beat on high in a stand mixer for a couple of minutes to beat some air in the mix.)
In a separate bowl, stir flour, salt and soda together. Add to wet bowl and mix until just blended.
Add chocolate chips.
Bake 9-10 minutes. Because of the brown sugar, they’re quite a bit darker than a normal chocolate chip cookie.

Posted in cooked at home
Potato Soup
Potato Soup
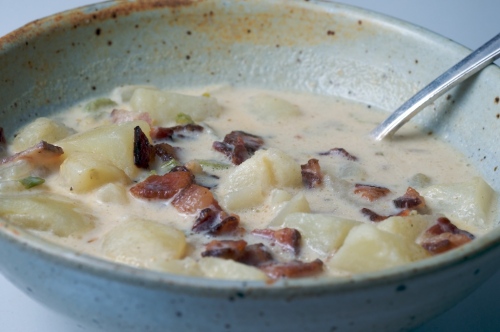
This is a classic that I’ve cooked for years, modifying and experimenting all the time. I think the secret to this one is two-fold: 1) Bacon, and 2) evaporated milk. The evaporated milk gives you dairy richness, but without as much fat as you’d get from cream. I sprinkle the bacon right before serving so it maintains some of its crispness. I’ve done a vegetarian version that’s pretty good. I used vegetable stock to pump up the flavor, and it did some, but it’s impossible to beat the bacon if you choose to eat it.
Ingredients
- 4 strips bacon, chopped
- ½ medium onion, chopped
- ¼ cup celery, sliced thin
- 6 small potatoes, peeled and diced
- 1 can chicken broth
- 1 can evaporated milk
- salt, pepper & other seasonings
Method
1. Brown bacon until crispy in a saucepan (or whatever pan you want to cook the soup in.
2. Remove the bacon, set it aside and pour off the fat.
3. Brown the onion and celery in the residual bacon fat until it’s soft.
4. Add potatoes to the pan, add chicken broth and add enough water to just cover the potatoes.
5. Bring to soft boil and simmer until the potatoes are soft (10 minutes or so, depending on the kind of potato.)
6. When the potatoes are done, add the evaporated milk and heat through. Season to taste.*
7. Sprinkle crispy bacon chunks to the soup right before serving.
* I use Penzey’s Turkish Seasoning as an all-purpose seasoning, in addition to kosher salt & pepper. Not many savory dishes come out of my kitchen without at least a pinch of it. I also use Cavender’s Greek Seasoning a lot. The soup shown here has a bit of each in it. Not a lot, just a sprinkle through the shaker top.
Posted in cooked at home


